Việc chọn đúng vị trí trước khi lắp đặt cổng dạng công xôn sẽ ảnh hưởng rất lớn đến hiệu suất hoạt động về sau. Hãy bắt đầu bằng cách kiểm tra lớp đất bên dưới toàn bộ khu vực. Đất sét thường nở ra khi ẩm ướt và có thể đẩy các móng trụ lệch khỏi vị trí theo thời gian. Cát thoát nước tốt hơn nhưng lại không chịu lực tốt dưới tải trọng. Hãy dùng một thiết bị penetrometer để kiểm tra độ chắc của nền đất tại những vị trí chúng ta sẽ thi công. Nếu kết quả đo dưới 1.500 psi, thông thường chúng ta cần gia cố nền bằng các lớp đá dăm hoặc một số kỹ thuật gia cố đất phù hợp. Khu vực cổng cũng cần được tạo độ dốc thoát ra xa lối vào, ít nhất là giảm 1% để nước mưa thoát đi chứ không đọng lại gây rỉ sét và hiện tượng nâng nền do đóng băng vào mùa đông. Khi lắp đặt, hãy kiểm tra cẩn thận độ thẳng hàng bằng máy cân bằng laser chất lượng. Với các cánh cổng dài hơn hai mươi feet, độ sai lệch nên được giữ trong phạm vi 1/8 inch trên mỗi đoạn mười feet, nếu không cổng sẽ bị kẹt nhanh chóng và làm hỏng các bộ phận sớm hơn. Đừng quên đánh dấu lại những nơi có thể có rễ cây lan rộng gần đó, xác định các đường ống hoặc cáp ngầm, và ghi chú các hành lang thoát nước hiện hữu vì những vấn đề tiềm ẩn này có thể gây hư hại nghiêm trọng cho công trình của chúng ta sau vài tháng hoặc vài năm.
Khi thiết kế móng, cần đảm bảo chúng phù hợp cả về tải trọng mà cổng sẽ chịu và loại môi trường mà chúng được xây dựng. Đối với những khu vực thường xuyên xảy ra đóng băng (như các Vùng chịu lạnh USDA từ 1 đến 5), cần đào móng sâu xuống dưới đường đóng băng ít nhất 12 inch. Hầu hết mọi người thấy rằng việc đào sâu từ 3 đến 5 feet khá phù hợp cho các khu vực lạnh hơn vì điều này giúp ngăn ngừa các vấn đề do đất giãn nở và co lại trong các chu kỳ đóng băng - tan băng. Ở các vùng khí hậu ấm áp hơn (từ Vùng 6 trở đi), công việc đơn giản hơn. Tại đây, chỉ cần đào sâu khoảng 2 đến 3 feet là đủ, miễn là có hệ thống thoát nước tốt gần đó. Kích thước của bản thân móng cũng phụ thuộc vào hai yếu tố chính: chiều dài của cổng và trọng lượng của nó sau khi lắp đặt.
| Chiều dài cổng | Kích thước móng (D×R×S) | Lưới cốt thép |
|---|---|---|
| 16 ft | 24"×24"×36" | #4 @ 12" o.c. |
| 17–24 ft | 36"×36"×48" | #5 @ 12" o.c. |
Các khu vực có thời tiết lạnh cần được chú ý đặc biệt khi đổ bê tông móng. Phương án tốt nhất là sử dụng hỗn hợp bê tông chèn khí 4.000 PSI vì nó chịu được tốt hơn trước các chu kỳ đóng băng - tan băng liên tục, vốn có thể làm hỏng bê tông thông thường theo thời gian. Nếu mực nước ngầm lên quá gần mặt đất trong một số mùa (trong khoảng ba feet), thì nên bao bọc khu vực đế móng bằng lớp ngăn ẩm dày ít nhất 6 mil trước khi lấp đầy lại. Và cũng đừng vội vã. Việc để bê tông đông cứng đầy đủ trong suốt hai mươi tám ngày trước khi lắp đặt bất cứ thứ gì lên trên là rất quan trọng. Bởi nếu không, làm sao chúng ta đạt được các yêu cầu cường độ tối thiểu nêu trong ACI 318? Việc vội vàng chỉ khiến phát sinh sự cố về sau.
Khi lắp đặt các kết cấu, độ sâu chôn và cách bố trí đế cần tính đến cả tải trọng mà kết cấu phải chịu cũng như điều kiện dưới mặt đất. Theo các hướng dẫn ngành nghề mà chúng ta đều tuân theo (như ANSI/ASTM F2200), thông thường nên chôn cột xuống ít nhất bằng một phần ba chiều cao của cột so với mặt đất. Và cũng đừng quên nhiệt độ đóng băng! Các cột ở khu vực được phân loại là Vùng 3 đến Vùng 5 cần được đặt sâu hơn đường đóng băng khoảng tối thiểu 12 inch. Về kích thước đế, hầu hết các chuyên gia đề xuất làm đế rộng gấp khoảng ba lần so với kích thước thực tế của cột. Nhưng chưa dừng lại ở đó! Loại đất cũng rất quan trọng. Các loại đất khác nhau có phản ứng khác nhau dưới tải trọng, do đó việc điều chỉnh dựa trên phân loại đất thực sự ảnh hưởng đến độ ổn định lâu dài.
Các biện pháp này đảm bảo độ ổn định dưới tải gió lên đến 50 dặm/giờ, như đã nêu trong ASCE 7-22.
Phương pháp neo ướt—đặt các cột trực tiếp vào bê tông tươi—cung cấp khả năng chịu tải vượt trội (lên đến 1.200 lbs) và độ cứng vững lâu dài nhưng đòi hỏi phải căn chỉnh chính xác trong quá trình đổ. Các hệ thống cải tạo sử dụng bulông nở trên bê tông hiện có và bị giới hạn ở khoảng ~800 lbs tải động. Các điểm khác biệt chính bao gồm:
| Tham số | Neo ướt | Cải tạo |
|---|---|---|
| Mô-men xoắn | N/A (bê tông đã đông cứng) | 85–100 ft-lbs |
| Khoảng cách U-Bolt | 12" cách tâm theo chiều đứng | 8" tâm dọc theo chiều đứng |
| Chờ thanh toán | ủ trong 28 ngày | Sử dụng ngay lập tức |
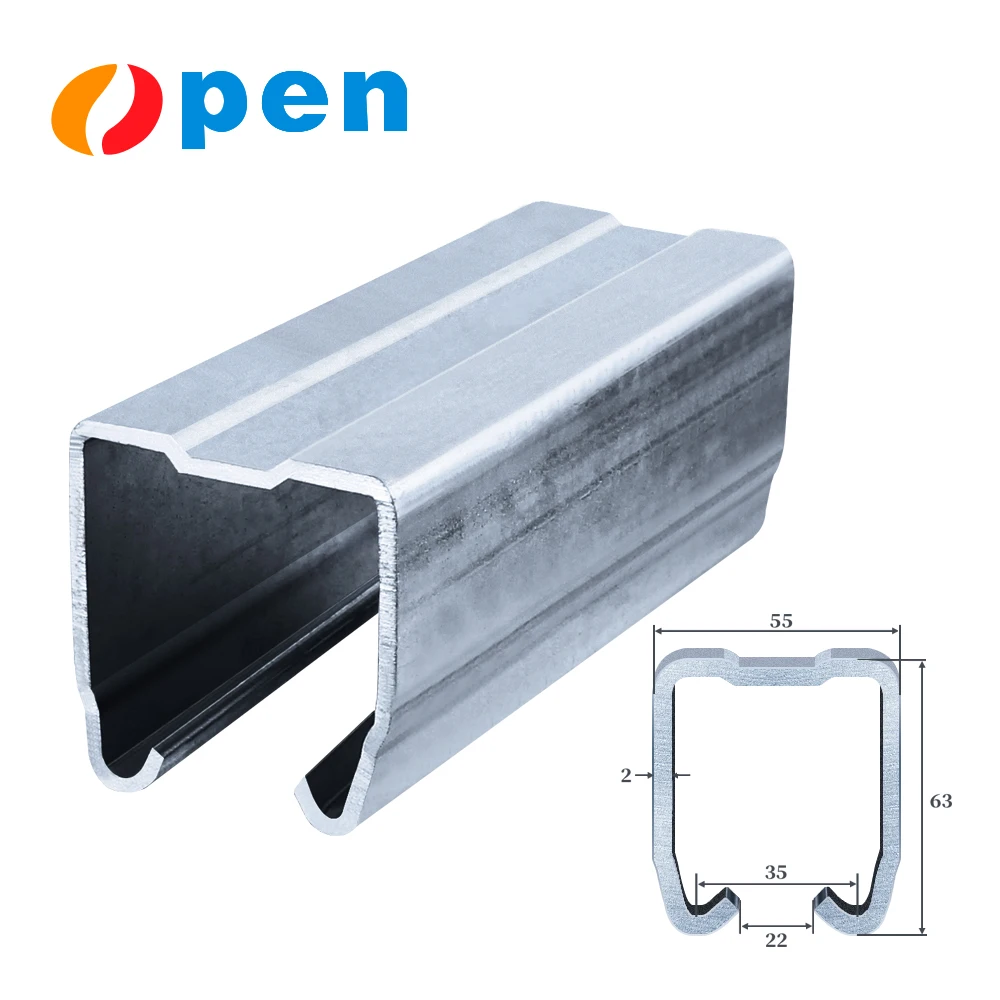
Đối với mọi lắp đặt bu-lông chữ U, hãy bôi hợp chất khóa ren (ví dụ: Loctite 242) và siết chặt dần theo kiểu chéo thành 90 ft-lbs. Luôn định hướng các kênh chữ U vuông góc với hướng di chuyển của cổng. Bao gồm khe giãn nở nhiệt 1/4" cho mỗi 10 feet chiều dài cổng để đáp ứng sự dịch chuyển vật liệu mà không bị kẹt.
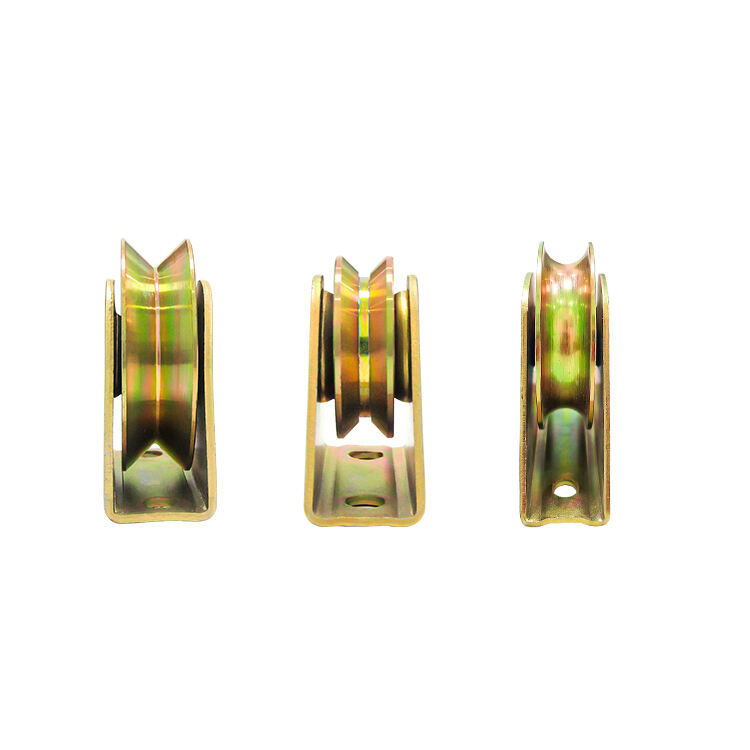
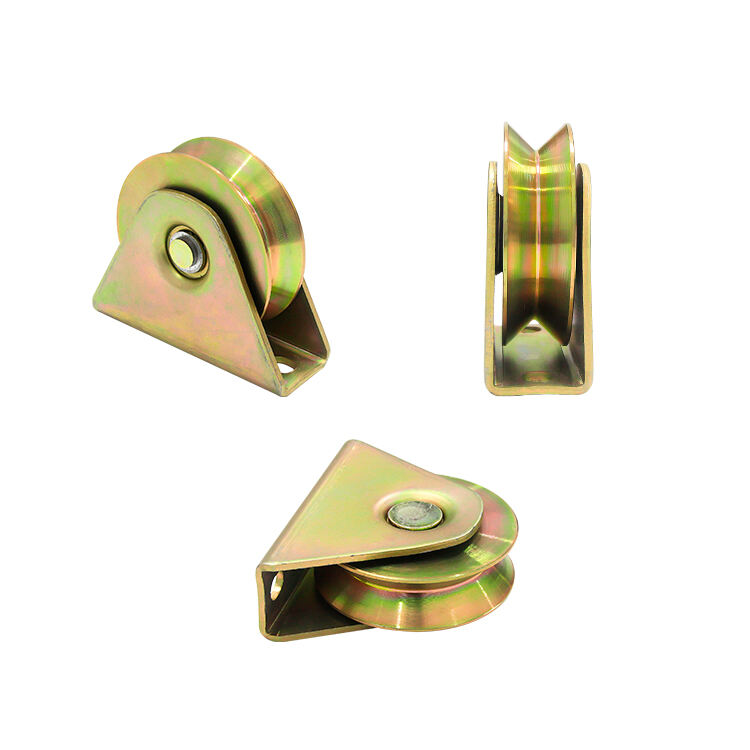
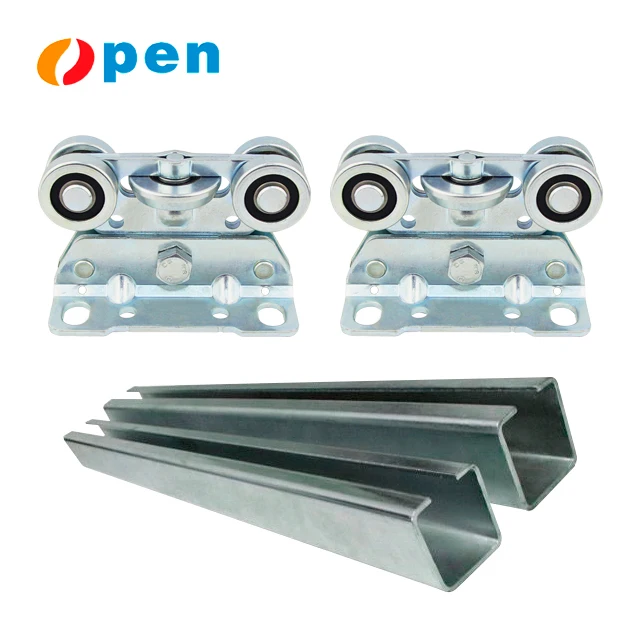
Khi lắp đặt các bánh xe trượt, hãy đảm bảo sử dụng đúng loại bulông neo tùy theo bề mặt đang xử lý. Các bulông nêm hoạt động rất tốt trên bê tông đã được đổ đúng cách, trong khi bulông xuyên thích hợp hơn cho các trụ thép. Mục tiêu ở đây là để các bánh xe nằm chính xác ở góc 90 độ so với đường ray. Đối với các cổng nặng hơn 1.000 pound, các bánh xe bằng gang hoặc bằng thép hàn toàn bộ sẽ cung cấp độ bền và ổn định cần thiết. Để căn chỉnh các con lăn, hãy bắt đầu từ điểm cao nhất trước tiên và dùng một ống thẳng dọc theo các bề mặt phía trên làm hướng dẫn tham chiếu. Khi siết các bulông chữ U, hãy tuân theo khuyến nghị mô-men xiết của nhà sản xuất, thường dao động khoảng 30 đến 40 foot-pound. Chúng ta cũng cần kiểm tra để đảm bảo mọi thứ vẫn song song với hướng chuyển động thực tế của cổng. Yêu cầu bảo trì cũng khác nhau — các con lăn nylon có bạc đạn kín về cơ bản tự duy trì, nhưng các phiên bản bằng thép cần được tra mỡ NLGI số 2 gốc lithium hai lần mỗi năm. Đừng quên lắp các nắp bảo vệ lên bất kỳ bộ phận nào có thể bị lộ ra vì điều này giúp ngăn ngừa kẹt ngón tay và giữ bụi bẩn không lọt vào các bộ phận chuyển động. Và trước khi kết nối bất cứ thứ gì với nguồn điện, hãy thử nghiệm cổng bằng tay. Nếu cần lực lớn hơn khoảng 20 pound để di chuyển, thì có bộ phận nào đó chưa được căn chỉnh đúng và cần điều chỉnh.
Duy trì dung sai khe hở nghiêm ngặt để ngăn ngừa mài mòn và kẹt do ma sát:
Khi xử lý các khu vực có nhiệt độ dao động trên 30 độ Fahrenheit theo mùa, cần để dư khoảng một phần tám inch không gian cho mỗi mười feet chiều dài cổng. Đối với những hệ thống được lắp đặt gần vùng ven biển, việc tăng mọi khoảng hở lên khoảng 15 phần trăm sẽ giúp giảm thiểu các vấn đề do lớp màng muối bám và sự bắt đầu ăn mòn. Việc kiểm tra định kỳ hàng tháng các đường ray bánh xe là công việc quan trọng, đặc biệt sau các giai đoạn đóng băng - tan băng khắc nghiệt khi mặt đất dịch chuyển đủ làm lệch nền móng tới gần 1,5 inch như chúng tôi quan sát trong điều kiện thực tế (ASTM D5918 cung cấp một số dữ liệu tốt về điều này). Cũng cần theo dõi các khe hở – nếu chúng nhỏ hơn mức một phần tư inch, việc điều chỉnh lại các con lăn phải được thực hiện ngay vì nếu không, động cơ sẽ phải hoạt động quá tải và các ổ bi thường hay hỏng trước thời hạn.
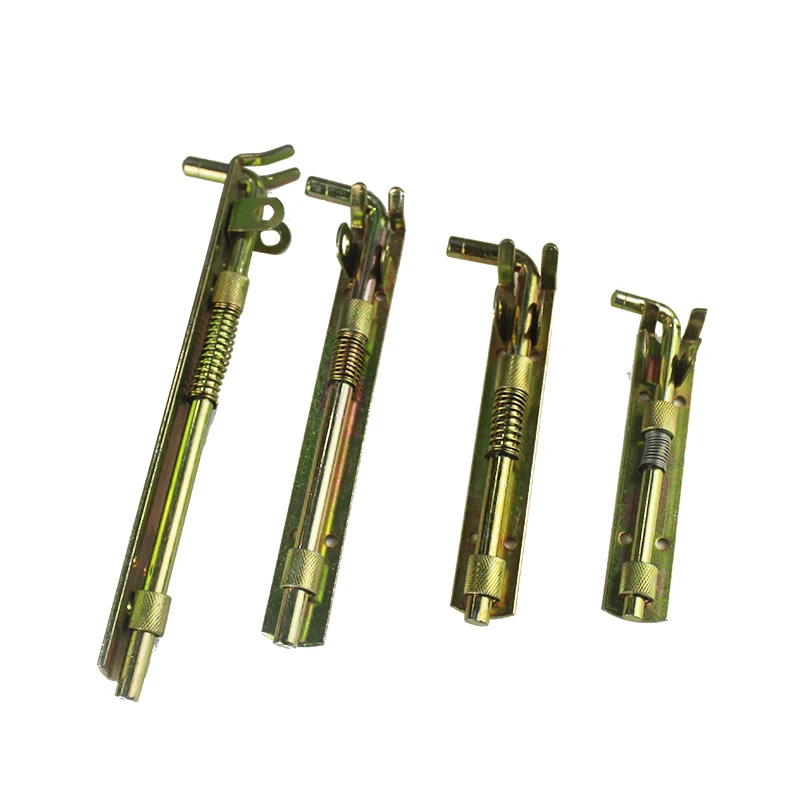
Khi mọi thứ khác đã được kiểm tra xong, đã đến lúc lắp tấm cổng vào các con lăn. Hãy sử dụng một thiết bị hỗ trợ cơ khí ở đây, chắc chắn không nên cố nâng bất cứ thứ gì dài hơn 12 feet bằng tay. Đặt khung dưới cùng sao cho nằm chính giữa ngay phía trên các con lăn, để khoảng cách từ 1/4 đến 1/2 inch giữa các con lăn trên và thanh ray cổng phía trên. Bây giờ hãy đẩy cổng qua lại trong toàn bộ phạm vi hoạt động của nó. Tiếp tục điều chỉnh độ cao các con lăn cho đến khi gần như không còn lực cản nào khi di chuyển. Khi lắp hệ thống chốt khóa, trước tiên hãy gắn bộ tiếp nhận dạng nĩa vào trụ neo, sau đó lắp bản chốt vào mép trước của cổng ở độ cao từ 36 đến 42 inch. Cũng cần sử dụng các bulông cấp độ 8 kèm theo vòng đệm. Đảm bảo mọi thứ căn chỉnh chính xác để chúng kết nối trơn tru mà không cần dùng lực. Các chốt kiểu V (Vee-catch) hoạt động tốt nhất với các hệ thống tự động vì chúng tự định hướng khi đóng vào vị trí và ngăn việc ai đó nhấc cổng ra khỏi ray. Sau khi lắp đặt, hãy thực hiện ít nhất mười lần mở và đóng hoàn chỉnh trong khi cổng đang chịu tải đầy đủ. Theo dõi kỹ các hiện tượng rung động, các con lăn lệch quá 1/8 inch, vấn đề về chốt khóa không ăn khớp đúng cách hoặc tiếng ồn lạ phát ra từ bộ truyền động. Đừng quên siết chặt lại tất cả các bulông chữ U với momen xoắn khoảng 45 đến 60 foot-pound và bôi keo hãm ren vào các bộ phận quan trọng như bulông chốt khóa và nơi lắp các con lăn. Những bước này sẽ giúp hệ thống hoạt động ổn định và bền bỉ trong nhiều năm tới.
Độ dốc phù hợp ngăn ngừa hiện tượng đọng nước và rỉ sét, điều này rất cần thiết để đảm bảo hiệu suất hoạt động lâu dài của cổng.
Ở khu vực lạnh, chân móng cần được đào sâu xuống dưới mức đóng băng, thường từ 0,9 đến 1,5 mét.
Loại đất ảnh hưởng đến độ ổn định; đất cát có thể yêu cầu cột sâu hơn trong khi đất sét sẽ có lợi khi dùng đế loe rộng.
Con lăn nylon đòi hỏi ít bảo trì hơn nhờ các vòng bi kín, mang lại chuyển động trơn tru.
 Tin nóng
Zhejiang Open Electromechanical cung cấp các sản phẩm phụ kiện cửa trượt và phụ kiện cổng cao cấp cho thị trường toàn cầu. Với thiết bị tiên tiến, hơn 20 năm kinh nghiệm và hơn 20 bằng sáng chế, chúng tôi mang đến các giải pháp bền bỉ và đổi mới. Nhà sản xuất đạt chứng nhận ISO. Hãy hợp tác với chúng tôi ngay hôm nay!